ALTERNATOR CONVERSIONS

You've just brought home a "new" rusty treasure.  Do you really think that old generator is going to generate?

Your starter just doesn't turn over with the zip you like.

You need a new 6volt battery or generator or voltage regulator.  Gee, those parts are expensive.

If you have any of these situations, it may be time for an alternator conversion.

     Most conversions are cheap and easy.  Advantages are quicker starting, cheaper parts, common 12volt batteries and lamps.  The only negative is if you are 
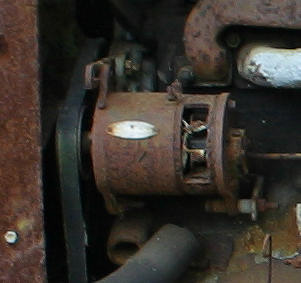
a showman.  A 1948 JD-M did not come from the the factory with an alternator and you will lose points if you have one.

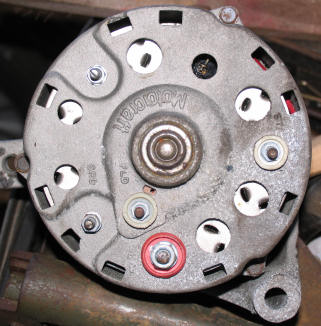
     The alternator is not the only cost.  If you have lights, you will have to install new 12v bulbs.  Ignition coils will have to be replaced or a ballast resistor will have to be added to tractors with distributors.  Ammeters, tachs, oil pressure gauges should not be affected, unless lighted.  The old 6volt starter will be fine.

     Eventually, we will have enough examples here so you can convert with just about anything you have around the shop.

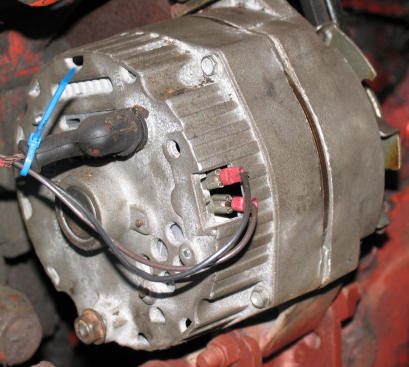
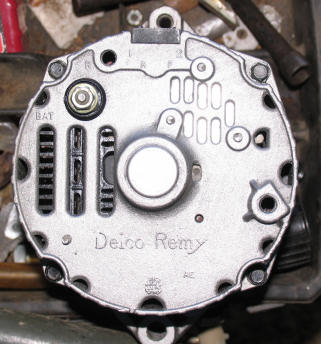
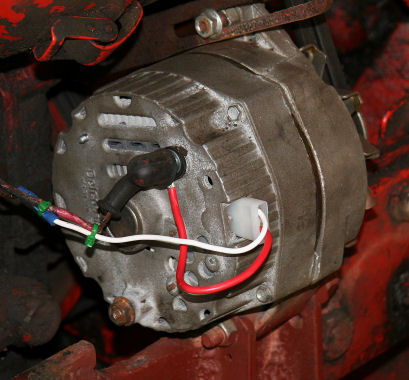
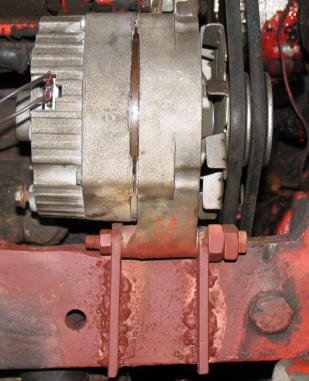
     If you have to buy, we recommend the Delco / Chevy 10SI.  Tell your parts guy you want one for a '72 El Camino.  Then tell him you need a single or double pulley.  Usually a single is what you want.  In some cases, you might want to go with a one wire version.  It is usually the easiest, but costs a little more. We have bought both versions locally and on eBay.

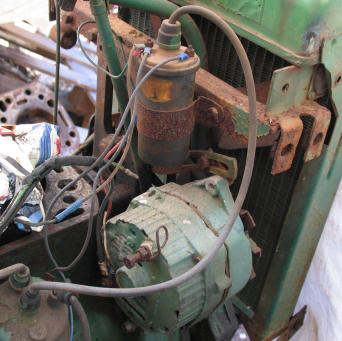
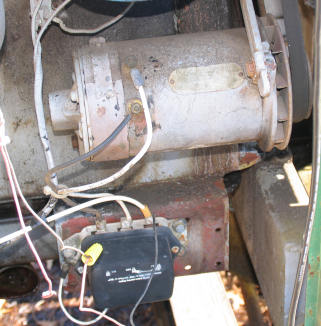
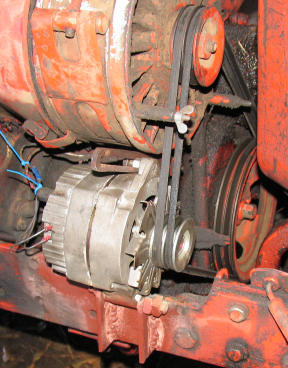
     As for brackets, they are not too hard to adapt or fabricate.  Usually some pipe or washers will do.  If not, you can find custom conversion brackets on eBay.


The Delco Alternator with internal voltage regulator.

 This is just the temporary wiring to test our Belarus 400 conversion, but you can see the terminals.  The two flat blades are in line, edge-to-edge..  This indicates the '70s model with a built-in regulator.

Earlier ones had the blades arranged flat-to-flat.  You can use them, but you will need a regulator and more wiring.  This story is about the self-regulated model.

The top terminal is labelled "1" and the bottom is "2".  "1" provides power to the field.  "2" is a voltage sense, usually just jumped over to the battery lead, on the big lug under the rubber boot.  The "1" terminal goes to the ignition switch through a lamp.  Any small, 12v lamp will serve as the alternator light.  It comes on when the ignition is on, but not running.

This is needed in some models. A few have an internal resistor that allows direct connection to the ignition circuit.  See the JD example below.

On this JD M, the "1" terminal is connected directly to the coil.  The red wire got spliced to the green wire to the coil.  The white "2" wire is connected to Battery lead.

Note that the terminals are on the opposite side, compared to the picture above.  Just remove the case screws and rotate to the desired alignment and put the screws back in.  If the case separates, you get to fiddle with getting the brushes back in without breaking something.  Avoid that.

What you can't see here is that the green alternator has the proper moulded plug.  These are available at most autoparts stores.  Look in the section with the miscellaneous, springs, clips, knobs and things.  The rebuilt alternator is usually under $60.  Don't tell them it is for a Farmall or whatever... that just confuses them. The typical unit puts out around 65 amps, compared to around 20-30 amps for the old generator, so don't worry about the heavy duty stuff.

     This Ford works just fine with a Chevy alternator!  We suspect that whoever did the conversion used the pulley from the original generator, as it is a little larger than we are used to seeing.  You'll have to try a pulley transplant on tractors with wide belts.  Note, too, that the integral coil on the front-mounted distributor needs to be a 12 volt unit.  These are readily available.

Here's a different breed of cat.  Notice that there is a rubber plug where the "1" and "2" terminals should be.  This is known as a "one-wire" alternator.  Just connect the battery cable to "BAT" lug and it is wired.  They often cost more.  We got this one on eBay for around $70, including shipping.  They can run up over $100 at the local auto parts.

A real plus here is that you can use it without rigging an idiot light.  We bought it to use on our Diesel Belarus, because there is no ignition circuit.  As it turns out, the Rooskies were a little odd and the standard 3 wire unit worked perfectly.  Since we have this extra alternator, we may have to buy another tractor!

We put it on a JD 420.  Sometimes it takes a while before it starts making power and we really have to spin up the engine to get the alternator to kick it.  Tractor engines usually turn slower than car engines.

Solar panels and a battery bank provide most of the electricity used at the Tractor Works.  This ancient genset handles the heavy loads, like the welders

This Continental Diesel in a military genset has a generator in good shape.  The regulator got water in it and is bloody expensive.  The hitch?  It has a 24volt system.  No problem, we bought the 24v module to go inside the standard alternator for $8.

If this were 12volt, we'd recommend the 1-wire alternator.  They can be found in 24volts, but as this unit is run for days at a time, under professional care, just a push button to battery can be used to energize it.  Remember, this one is a diesel and has NO ignition circuit.  This particular unit has a low voltage circuit derived from the 3phase generator which can operate the field.

Now what?  Disconnect the batteries and pull out the old gen and regulator.  The bracket on the engine block is too wide, so cut a piece of pipe or grab a stack of washers to fit.  Make sure the pulleys line up and bolt it back together.  Hook up the battery wire.  Connect the "1" and "2" terminals as needed.

The Russians make an alternator that looks like a generator.  It is a pretty good unit, but is so cramped you can't keep things tight.  We decided to go Delco.  Old one is beside it.

The Roosky unit barely fit, so the fat Delco surely wouldn't.  We considered an Isuzu unit, but it had fit problems too.  So we notched the frame and added external brackets.

If you go cutting around a greasy old engine, figure you are going to set things on fire.  Keep a bucket of sand handy.  We put some down in the frame rails before starting.  Grinding it smooth also tried to start a fire.

The small wire welder didn't start any fires, but didn't weld very well either.

The engine would not start without the field wire connected, so we hooked it to both the "1" and "2" terminals.  After the shakedown, it got a proper connector.  You can see here the #2 wire going to +12 battery terminal and the white #1 wire goes up to the check engine light. The wire plug cost about $4 at a NAPA store.

Left:  The new Delco Alternator
Right:  The old Belarus Alternator
Below:  With proper connector


 We cut off two pieces of steel and burned bolt holes in them.  They were cleaned up with a grinder.  The frame was notched and ground.  The two brackets were bolted to the alternator.

Alignment was accomplished by clamping a flat bar across the crankshaft pulley and pushing the alternator flat to it.  While that was held in place, we welded the brackets to the frame.

The old top bracket had the wrong curve.  We thinned the bottom of a straight one from a Massey-Harris combine and used a nut between it and the alternator to make the alignment perfect.

With temporary wiring and bolts in place, we put on the belts and fired it up.  It works great.

     All we need now is to get a proper connector and a bolt the right length.  We might even clean up the rough weld and give it another coat of paint.

     The old Belarus alternator still works, so we might try it in a place where it has a little more room.  It will look more like an original generator.

Coming soon, connecting a Ford alternator.

Our '84 F250 has one like this.  The regulator module for it cost just a few dollars, so if you have room to mount it, consider the Ford.  The red term goes to the battery.  The white FLD term goes to the regulator.  If you do not use a regulator, you can get 120 volts dc out of this baby and can run a chainsaw, skill saw, halogen lights, etc.